Caramel Brown Sugar Pie
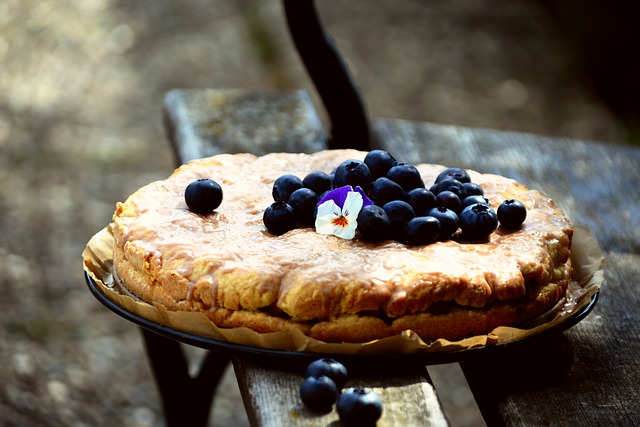
Ingredients & Directions 2 Recipes Lu Lens Beginners -Pie Crust 1/4 c Butter,; at room temperature 6 tb All-purpose flour 1/2 c Heavy cream 2 c Firmly packed brown sugar 2 Eggs,; lightly beaten 2 ts Vanilla extract 1 c Fresh or frozen and -defrosted berries or p; -for garnis Preheat the oven to 375 degrees. Line an 8-inch pie pan with half of the pie dough. Roll out the remaining dough or crust into a round to top the pie. Stir the butter with the flour in a heavy saucepan over low heat to make a smooth paste. Whisk in the cream and sugar. Bring to the boil, reduce the heat, and simmer the filling until it thickens, about 3 minutes, whisking constantly. Add a small portion of the warm liquid to the eggs, then stir them into the pan. Stir in the vanilla. Strain the filling into the lined pie pan. Top with the round of pie dough and crimp the edge decoratively to seal. Cut 4 to 5 slits in the top to allow steam to escape. Bake until the crust is nicely browned and the filling is set, 45 minutes to 1 hour. Serve with the fresh berries or peaches. Yield: 1 8-inch pie Yields 1 Servings
Fudge
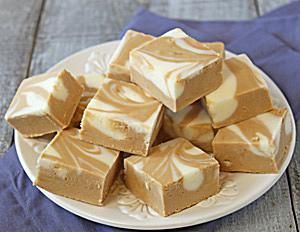
Ingredients & Directions 3 c Sugar 1/2 c Milk 1/4 c Cocoa powder 1 ts Vanilla If I remember the recipe, it’s basically sugar, milk, and cocoa powder. Stir over low heat until everything dissolves, then allow to cook slowly with minimal heat until it reaches the soft-ball stage (when a bit is dropped in cold water, it makes a soft, slightly chewy, ball). Allow to cool a bit, then quickly add vanilla (or vanilla with some other complementary flavor; cherry works well), and beat rapidly and quickly turn onto a buttered plate. Warning: it gets stiff *FAST* when you add the vanilla and beat. Once it starts to thicken up, get it out of the pan as quickly as possible. Allow to cool, cut into small pieces, and distribute to friends before you get sick of it. Oh yes, do this on a bright, sunny, high-pressure low-humidity day only. Otherwise it will crystallize wrong and come out grainy. * From the Polka Dot Cottage, 1-201-822-3627, NJ’s BBS for Homemakers! Yields 1 Servings
Fat-free Baking Powder Biscuits
Ingredients & Directions 2 c Flour* 2 tb Baking powder 3/4 ts Salt 1/2 c Apple sauce 1/2 To 2/3 cup Cold low-fat buttermilk, Skim milk or milk Substitute In a larger bowl, sift together the flour, baking powder and salt. Sprinkle the applesauce over the flour, and cut in with a pastry blender until it is in bits the size of split peas. The texture should be somewhat course. Sprinkle 1/2 cup cold milk over the flour and applesauce, and stir it in quickly with a fork. Add only as much of the milk as is necessary to make the dough hold together. Gather the dough up into a ball, working it together with your hands very briefly, and then roll it out 1/2 inch thick on a floured board. Cut out small rounds (about 2 1/2″ to 3″ in diameter) and place them on a cookie sheet spritzed with Pam. If you aren’t going to put them in the oven immediately, chill them in the refrigerator until ready to bake. Bake the biscuits in a preheated oven at 450 degrees for 10 to 12 minutes, or until puffed and lightly browned on top. Makes about 15 – 20 biscuits. * preferably, use white pastry flour. All-purpose flour or whole-wheat pastry flour can be used, but the biscuits will be denser and less fluffy. Gravy recipe follows. Yields 1 Servings
Salt-rising Bread (prodigy)
Ingredients & Directions 3 1/2 c Thinly sliced new potatoes 5 ts Salt 3 tb Honey 2 tb Yellow cornmeal 4 c Boiling water 1 ts Baking soda 8 c All-purpose flour 1 c Milk 2 tb Olive oil PREHEAT OVEN TO 350F. Place potatoes, 3 teaspoons salt, honey and cornmeal in a stainless steel bowl and cover with boiling water. Cover with a cloth and let stand for about 15 hours. Maintain temperature at about 90F. Drain and discard the potatoes. Reserve the water. Place baking soda, remaining 2 teaspoons salt and 3 cups of flour in a mixer, turn to slow speed and add the potato water. Beat about 5 minutes. Scrape the “sponge” into a mixing bowl, cover with a damp cloth, place in a warm part of the kitchen and let rise until bubbles form, about 1 1/2 hours. Meanwhile, combine milk and olive oil in a small saucepan, bring to a boil and immediately remove from the heat. Let cool to lukewarm. Replace the sponge in the mixing bowl, add the milk and slowly incorporate remaining 5 cups of flour. Knead with a dough hook for 7 minutes. If dough seems too sticky, add up to 3/4 cup additional flour. Divide dough in 3 and place in greased loaf pans. Cover with a damp towel, place in a warm spot and let rise until doubled in volume. Bake for about 1 hour. Makes 3 Loaves MICHAEL ROBERTS – PRODIGY GUEST CHEFS COOKBOOK Yields 3 Servings
Jar Cakes
Ingredients & Directions Ever baked cakes in canning jars? It’s neat! ANY quick bread-type cake can be baked in canning jars. I usually bake one jar first — you have to know how high the batter rises. I usually fill ONE jar 1/2 full then bake it to see how high it rises, then go from there. You don’t want the cake to come out of the top of the jar, only to within 1/4 to 1/2 inch from the lip of the jar. Write it down on your recipe (how far you filled the jars)! Once you’ve established how high the cake rises, you can go from there. The first time around is a bit tricky because you won’t know how many jars you’ll need. MOST of the recipes I’ve tried I end up using around 8. Sterilize as many jars as you think you’ll need and go from there. Make sure your LIDS are new, the rings don’t have to be As the jars do seal, the cakes are as moist as the day you put them into the jars–sometimes MORESO. The baking times will vary — the moistness of each cake recipe will determine the time. MOST of the recipes I’ve tried bake in 35-40 minutes. Start checking the cakes at 25- 30 minutes and go from there. YES, the cakes DO slide easily out of the jars IF you use the jars I’ve listed. They’re Ball 12-oz Quilted Crystal Canning Jars (#14400-81400). They can be found at most grocery stores (at least here in California) next to the pectin and other canning supplies. Also, I’ve seen the 12 oz straight-sided (plain) jars (# ?) at Smart & Final. The plain jars work fine too but they’re not as pretty and you have to make your own labels–the jars I use come with decorative labels. One IMPORTANT tip–get your jars NOW! Once summer’s over with they’re very hard to find. Also, when you can, ask for the jars back, they’re NOT cheap. Most folks don’t mind returning them though, they usually want refills! G There will be a little condensation on the lids and some in the jars so when you seal them it’s trapped inside. Don’t worry about getting the water off of the lids before placing them onto the jars, the added moisture doesn’t hurt the cakes in the slightest. Quick bread-type cakes work best, I’ve found that lighter cakes tend to fall when the jars seal. I’m trying to address every question that’s been asked of me before, I HOPE I’ve done that. If I’ve missed anything or if anyone has any questions, don’t hesitate to ask. These make WONDERFUL Christmas gifts and you cn start NOW! Single friends really appreciate these because each jar makes enough for one or two people. I’ll post the recipes I’ve made in my next notes. Try them, they’re FUN and delicious to boot! Be right back with a few more tips… Several folks have asked me how long the cakes can be safely stored…I’m not sure. The longest I’ve been able to keep them (without getting eaten) is 6 months. The jars DO seal, just like any canned good. You don’t have to refrigerate the jars, just keep them in a COOL, dark, dry place. I’ve only had 6 jars go bad on me and that was my fault…put them in a cupboard that got too hot and the seals broke. I now check the jars at least once a week by pushing down on the lid (in the middle); if the lid moves up and down, that means the seal has broken. If you’ve checked the jars frequently, more than likely they’re safe to eat; otherwise, toss the cake. I’ve been making cakes in canning jars for over 3 years and haven’t poisoned anyone so far. 🙂 If you give the jars away, be sure to tell the person to check the jar periodically (if they plan on storing it for any length of time). Not only are the cakes tasty, they’re very pretty to decorate. A hot glue gun is INVALUABLE! You cn glue on dried flowers, ribbons, dough-art …you name it, it can be glued onto the lid, ring and side of the jar. I usually cut out a piece of cloth (about 3 inches larger in circumference than the lid), using pinking shears (so the cloth doesn’t unravel), place a wad of cotton or batting in the center of the lid (take the ring off — the jar lid should be sealed by now), then place the piece of cloth on top and replace the ring. Decorate to your heart’s desire! There are probably a few more tips I’ve forgotten…if anyone has any questions, don’t hesitate to ask. Don’t limit yourself to the recipes I’ve given you…ANY quick-bread type cake cn be baked in canning jars. Lighter cakes tend to fall once the jar seals. Be right back with the first recipe… Linda/BDT Burbank, CA (USA) Yields 1 Servings
Sugar Free White Bread
Ingredients & Directions 1 1/2 c Water 2 tb Butter 2 tb Fructose 1 ts Salt 4 1/2 c Bread flour 1 1/2 ts Active dry yeast Measure all ingredients in pan according to manufacturer’s directions. Yields 2 Lb loaf
Butter Or Sugar Cake On A Baking Sheet
Ingredients & Directions CAKE DOUGH 3/4 oz (20g) yeast 3 Drops baking essence 1 ts Sugar Bitter almond flavor 1/2 pt (285ccm) lukewarm milk 1 Pinch salt 1 1/8 lb (500g) flour 1 3/4 oz (50g) butter, margarine, 2 1/2 oz 3 1/2 (75-100g) sugar Or lard, or 3 tb oil TOPPING 1 3/4 oz 4 1/2 (50-125g) butter 1 3/4 oz (50g) almonds (blanched and 2 1/2 oz (75g) sugar Chopped) or Hazelnuts 1 Packet vanillin sugar (blanched and chopped) FOR THE CAKE DOUGH: cream the yeast with 1 tsp of the sugar and 5 tbs of the milk. Sieve 2/3 of the flour into a large mixing bowl, make a well in the center and pour in the yeast; cover with 1/4 in (1/2 cm) layer of flour. Distribute the sugar, flavoring, and melted lukewarm fat on the flour around the well; take care that they do NOT come in contact with the yeast. As soon as the yeast shows large cracks, begin to stir all the ingredients together, starting from the middle, and gradually adding the rest of the milk. Beat the dough with a strong wooden spoon until it shows bubbles. Knead in the rest of the flour; if the dough should be sticky add a little more flour, but not too much the dough should remain soft. Leave in a warm place until the dough has doubled in size. Knead thoroughly again and roll out on a greased baking sheet. Place a folded piece of greaseproof paper against the dough at the open end of the baking sheet. FOR THE TOPPING: Either flake the fat evenly over the cake or melt it and brush it over. Mix the sugar with the vanillin sugar and nuts and sprinkle evenly over the cake. Leave in a warm place until the cake has doubled in size and then bake. OVEN: preheat for 5 minutes at very hot, bake at moderately hot. BAKING TIME: about 15 minutes from Dr. Oetker German home baking Typos by Molli Yields 8 servings